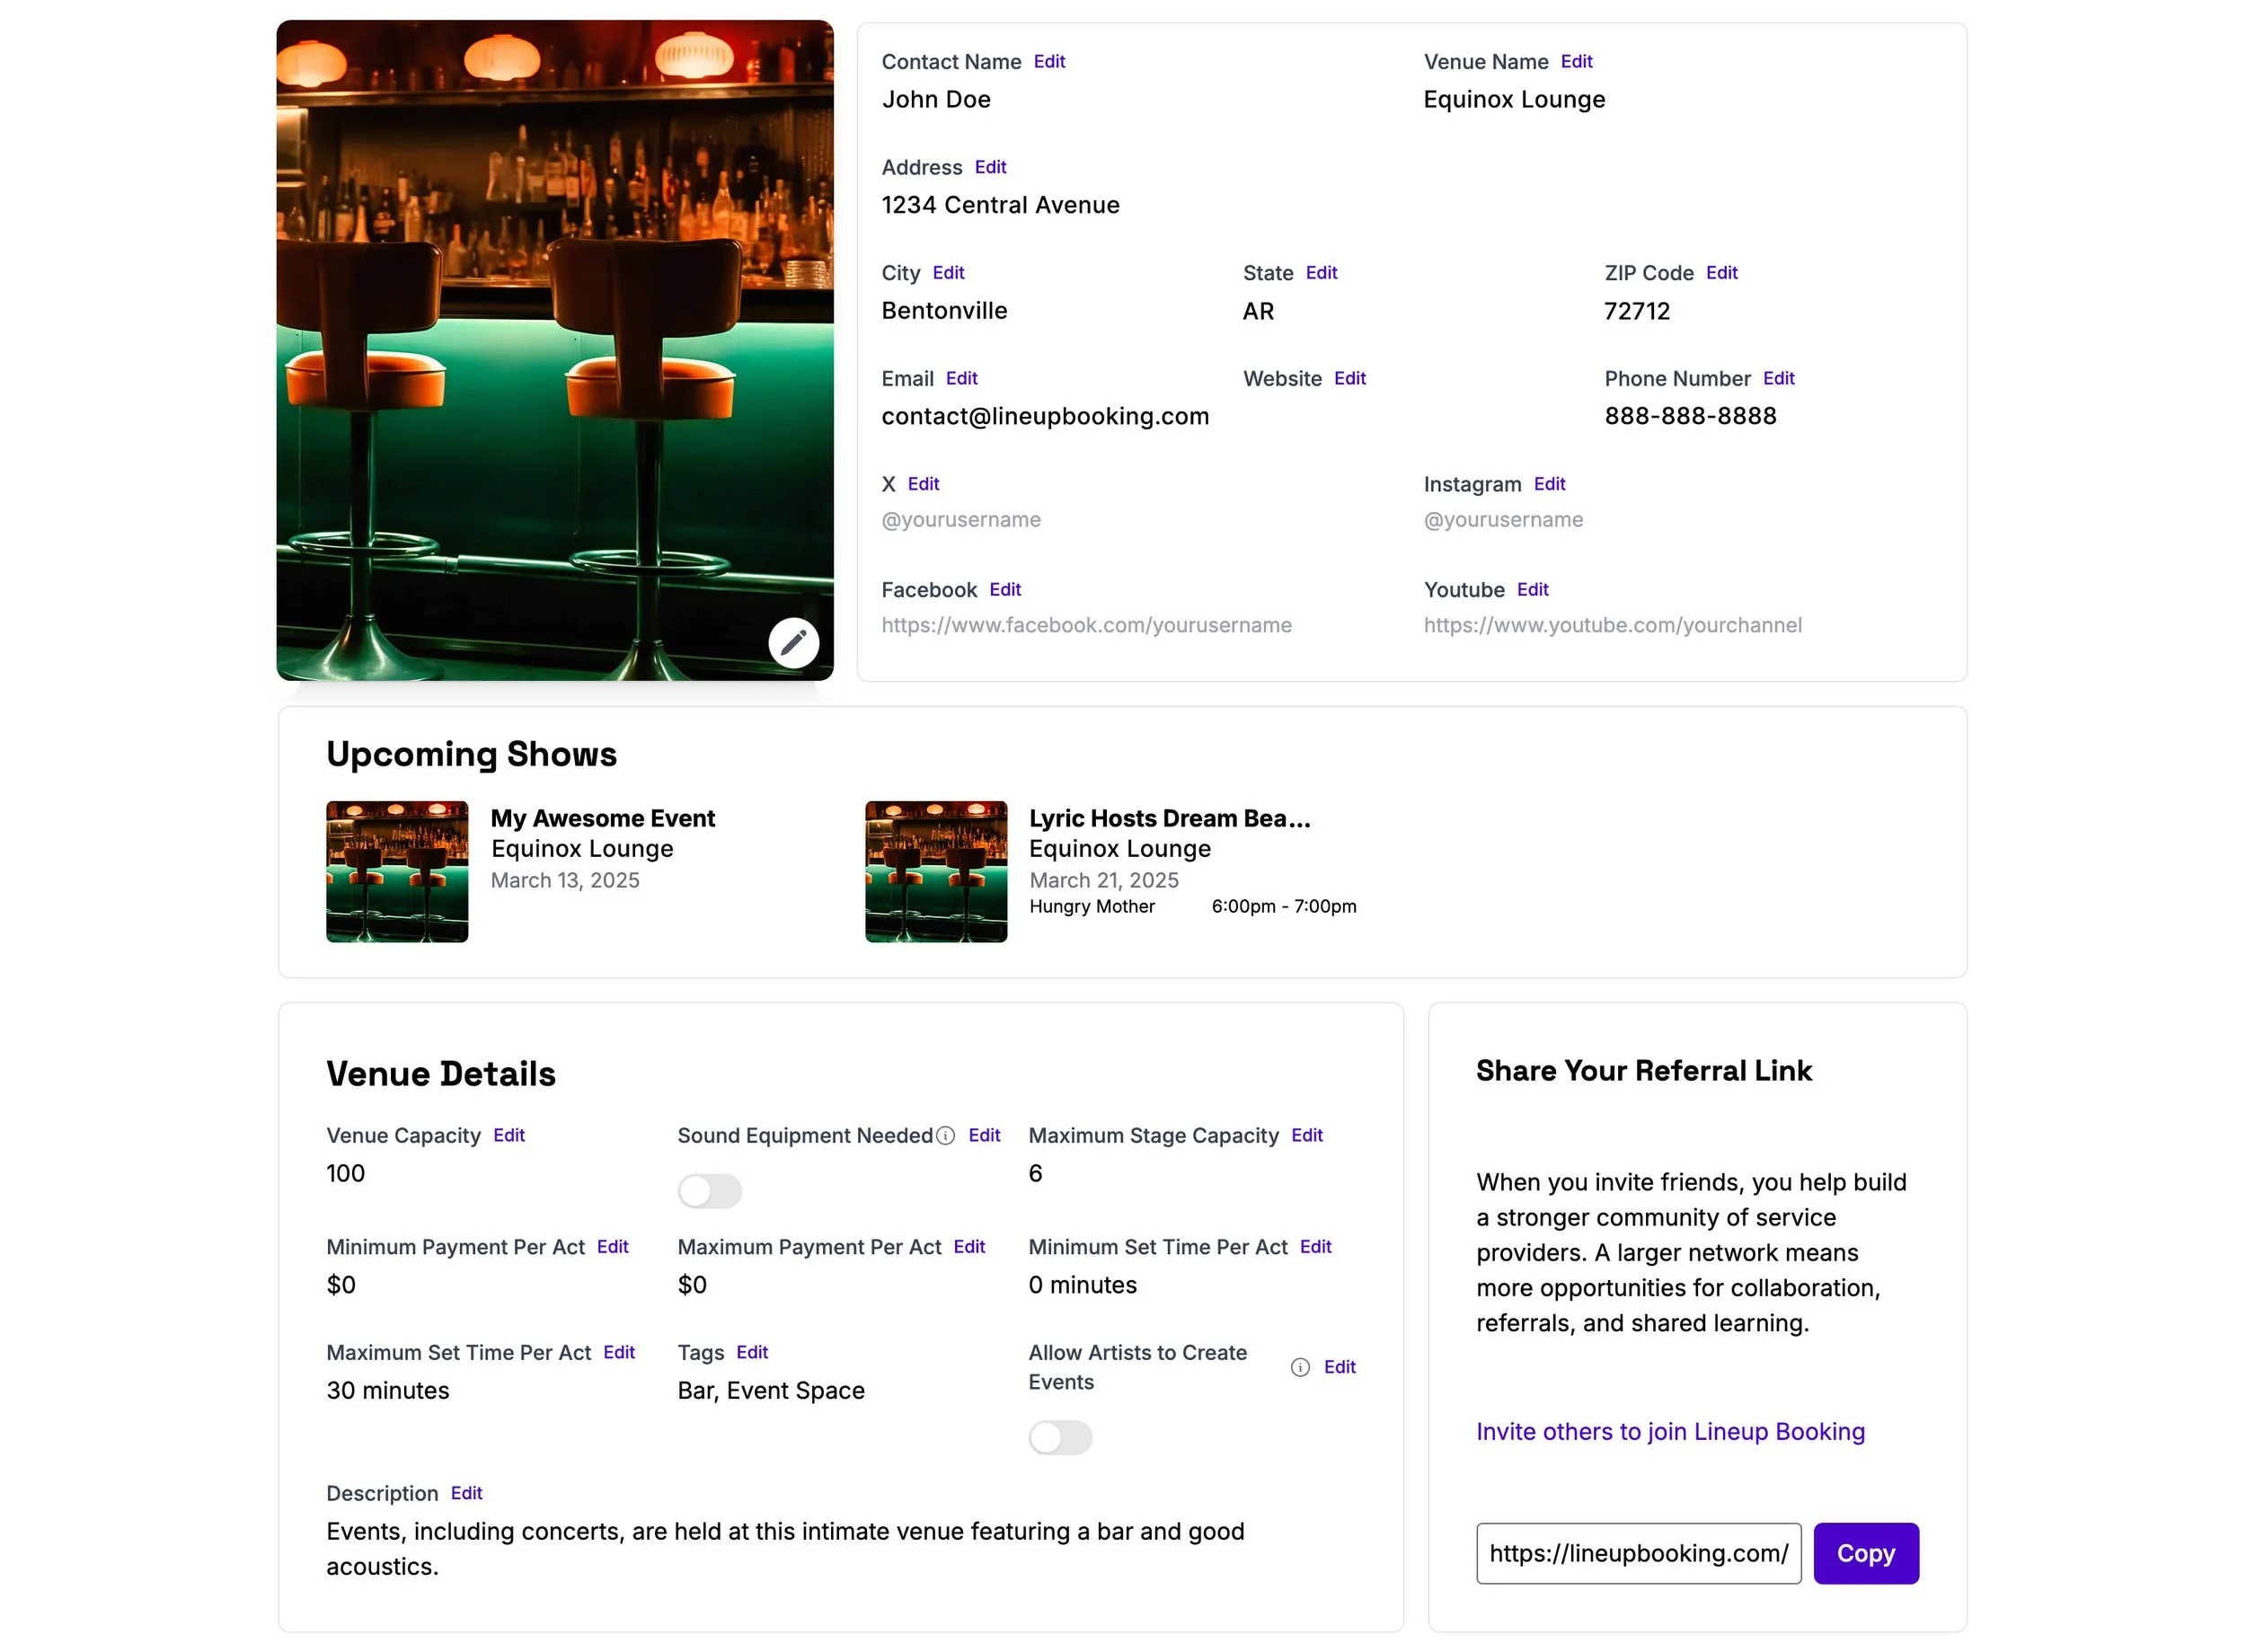
Your Venue Profile
Now that you’re familiar with your dashboard, let’s explore your profile settings.
From your profile, you can:
Upload a custom Profile Picture
Update your Tags and Bio.
Set your Price Range.
Edit links to external profiles or websites.
Add Venue Details
We recommend filling out as many details as possible in the available fields to enhance your visibility. This greatly increases the chances of your profile appearing in search results, and in specific categories that reflect your selected genres, location, and price range.
In the Venue Details section, you can provide key information about your venue, including Capacity, Maximum Set Time, and more. To allow artists to initiate bookings, enable the "Allow Artists to Create Events" option. Additionally, be sure to toggle on/off whether artists need to bring their own sound equipment in the corresponding field.
Note: The Contact information you provide will not be viewable on your public profile view, but will only be made available to artist’s you’ve confirmed booking with.
If you’d like to check the appearance of your public profile and the viewable bookings, go to the Venue tab in the navigation panel and search for your venue.
Note: Draft or private bookings will not appear on your public profile. To make them visible, add a time slot to a drafted booking or change an existing time slot’s status to "Allow Booking Requests."
If you’re ready to book shows, continue to the next tutorial: "Your Calendar."

