Getting Started on Lineup
In this post we’ll be walking you through the first steps to setting up an account on Lineup.
Begin the Sign-Up Process
From the homepage you can select "Login” from the Navigation bar or "Sign Up" to get started.
Select Google Login
You’ll be prompted to login and verify your identity via your google login, and be required to certify that all parties are 18 years or older.
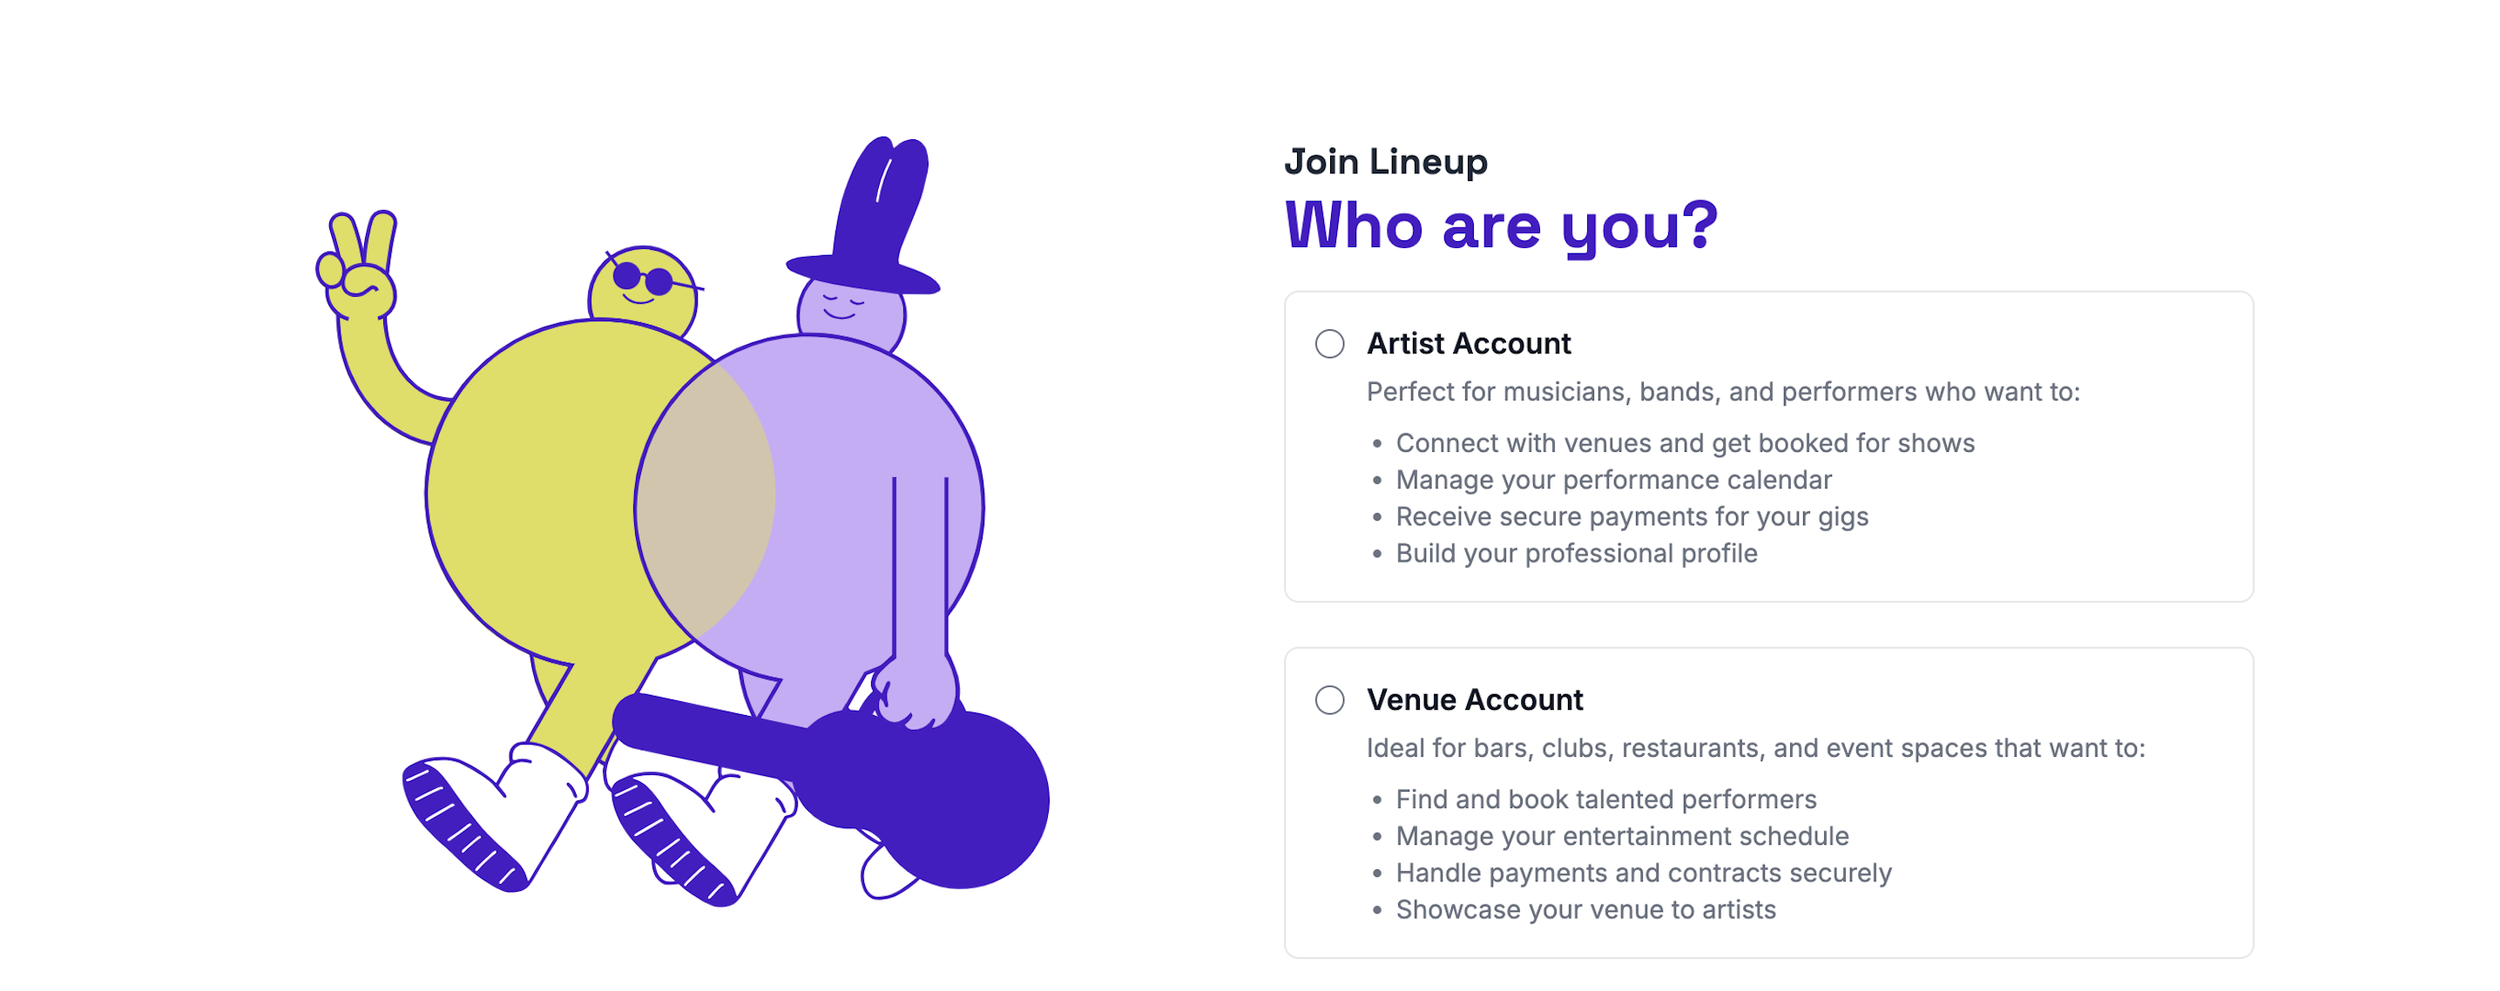
Next, select an Artist Account
Verify Your Credentials
Use Spotify’s API to search for your profile.
Once you’ve located your profile, confirm your basic credentials and provide additional details as needed.
Note:
When claiming your Spotify profile, you can choose to enable or disable music previews on your Lineup profile page. You can update this setting any time by selecting Profile from the dropdown menu and toggling the preview option on or off as needed.
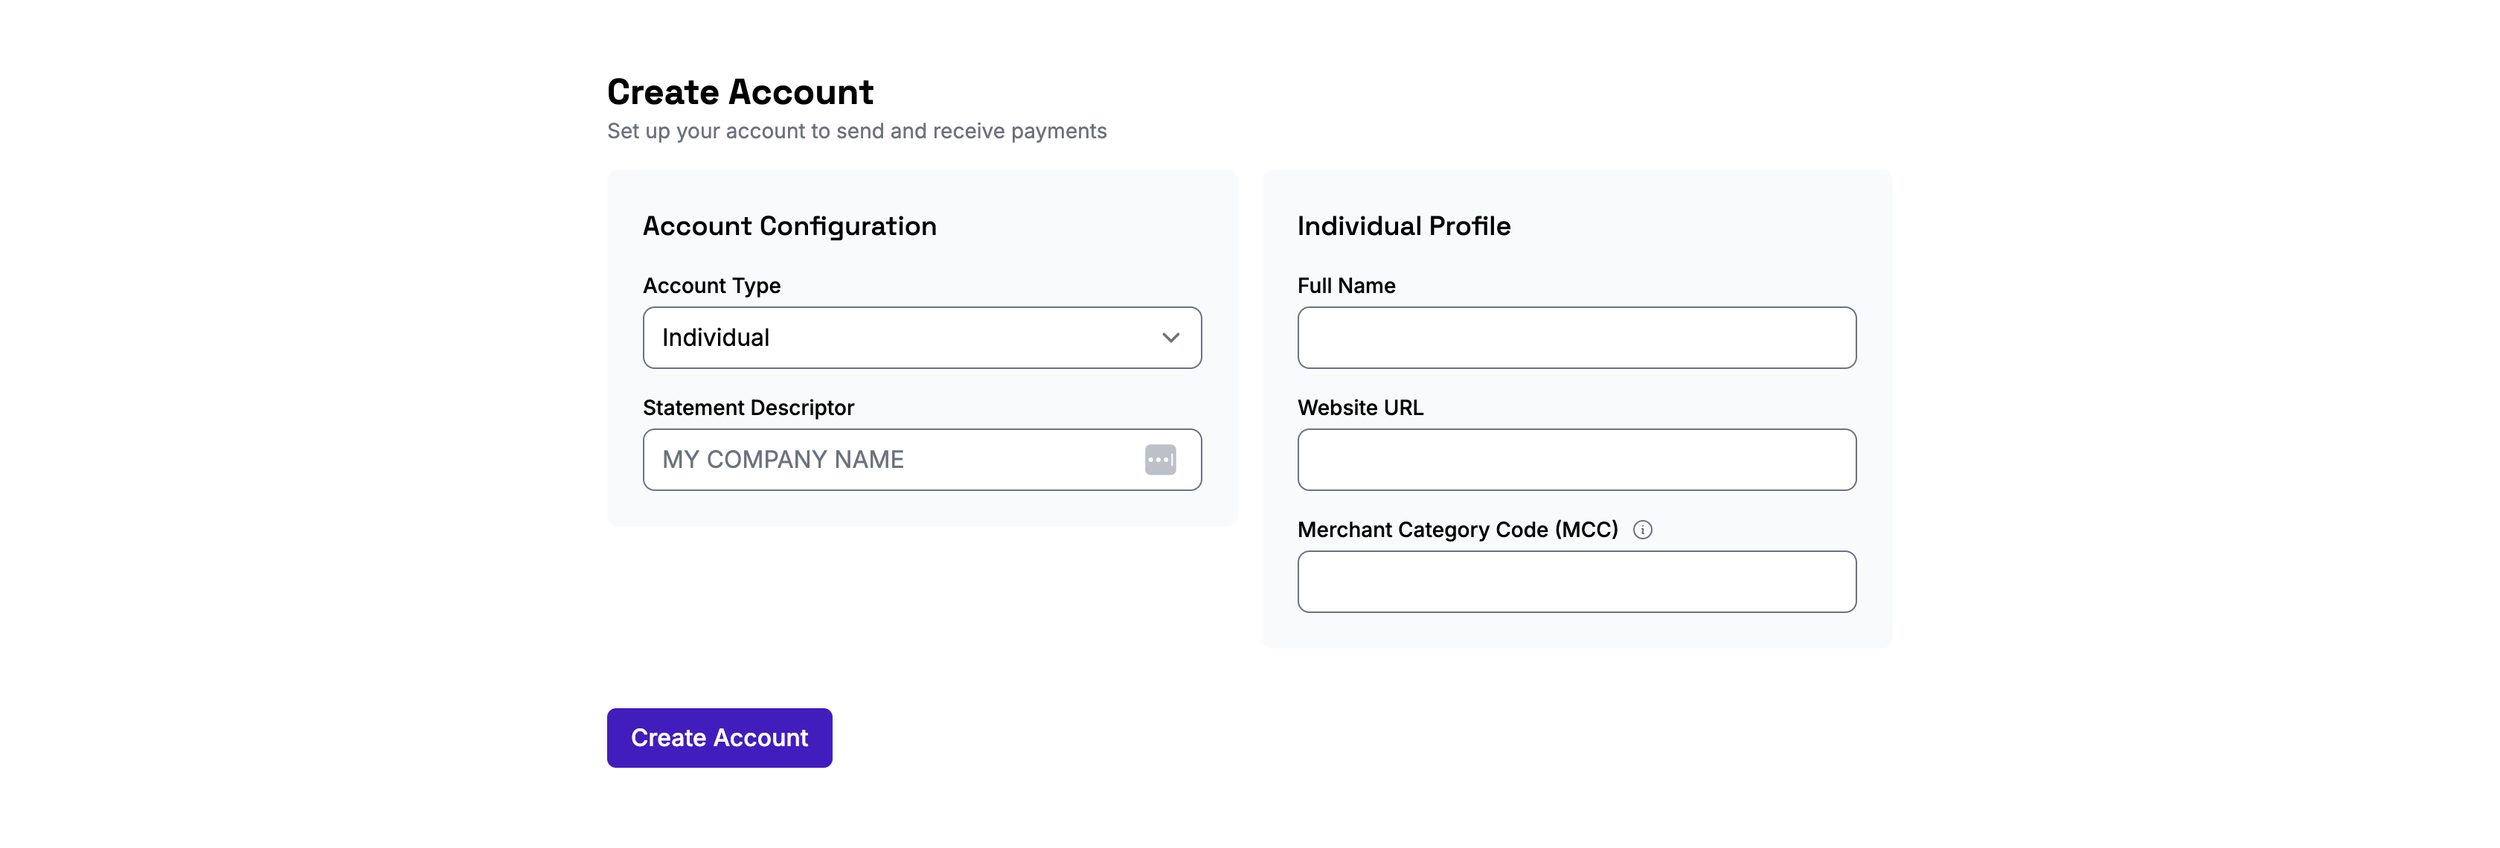
Select Your Account Type
On this page, you'll need to:
Choose your account type (Individual, Sole Proprietor, LLC, Multi-Member LLC, or Corporation).
Specify the name that will appear on statements and receipts.
Provide basic personal or business details.
Note:
In most cases, your Merchant Category Code (MCC) will be 7929 (Entertainers, Bands, Orchestras). If you wish to use a specific category code to define yourself as an artist or band you can always check the full list of codes here.
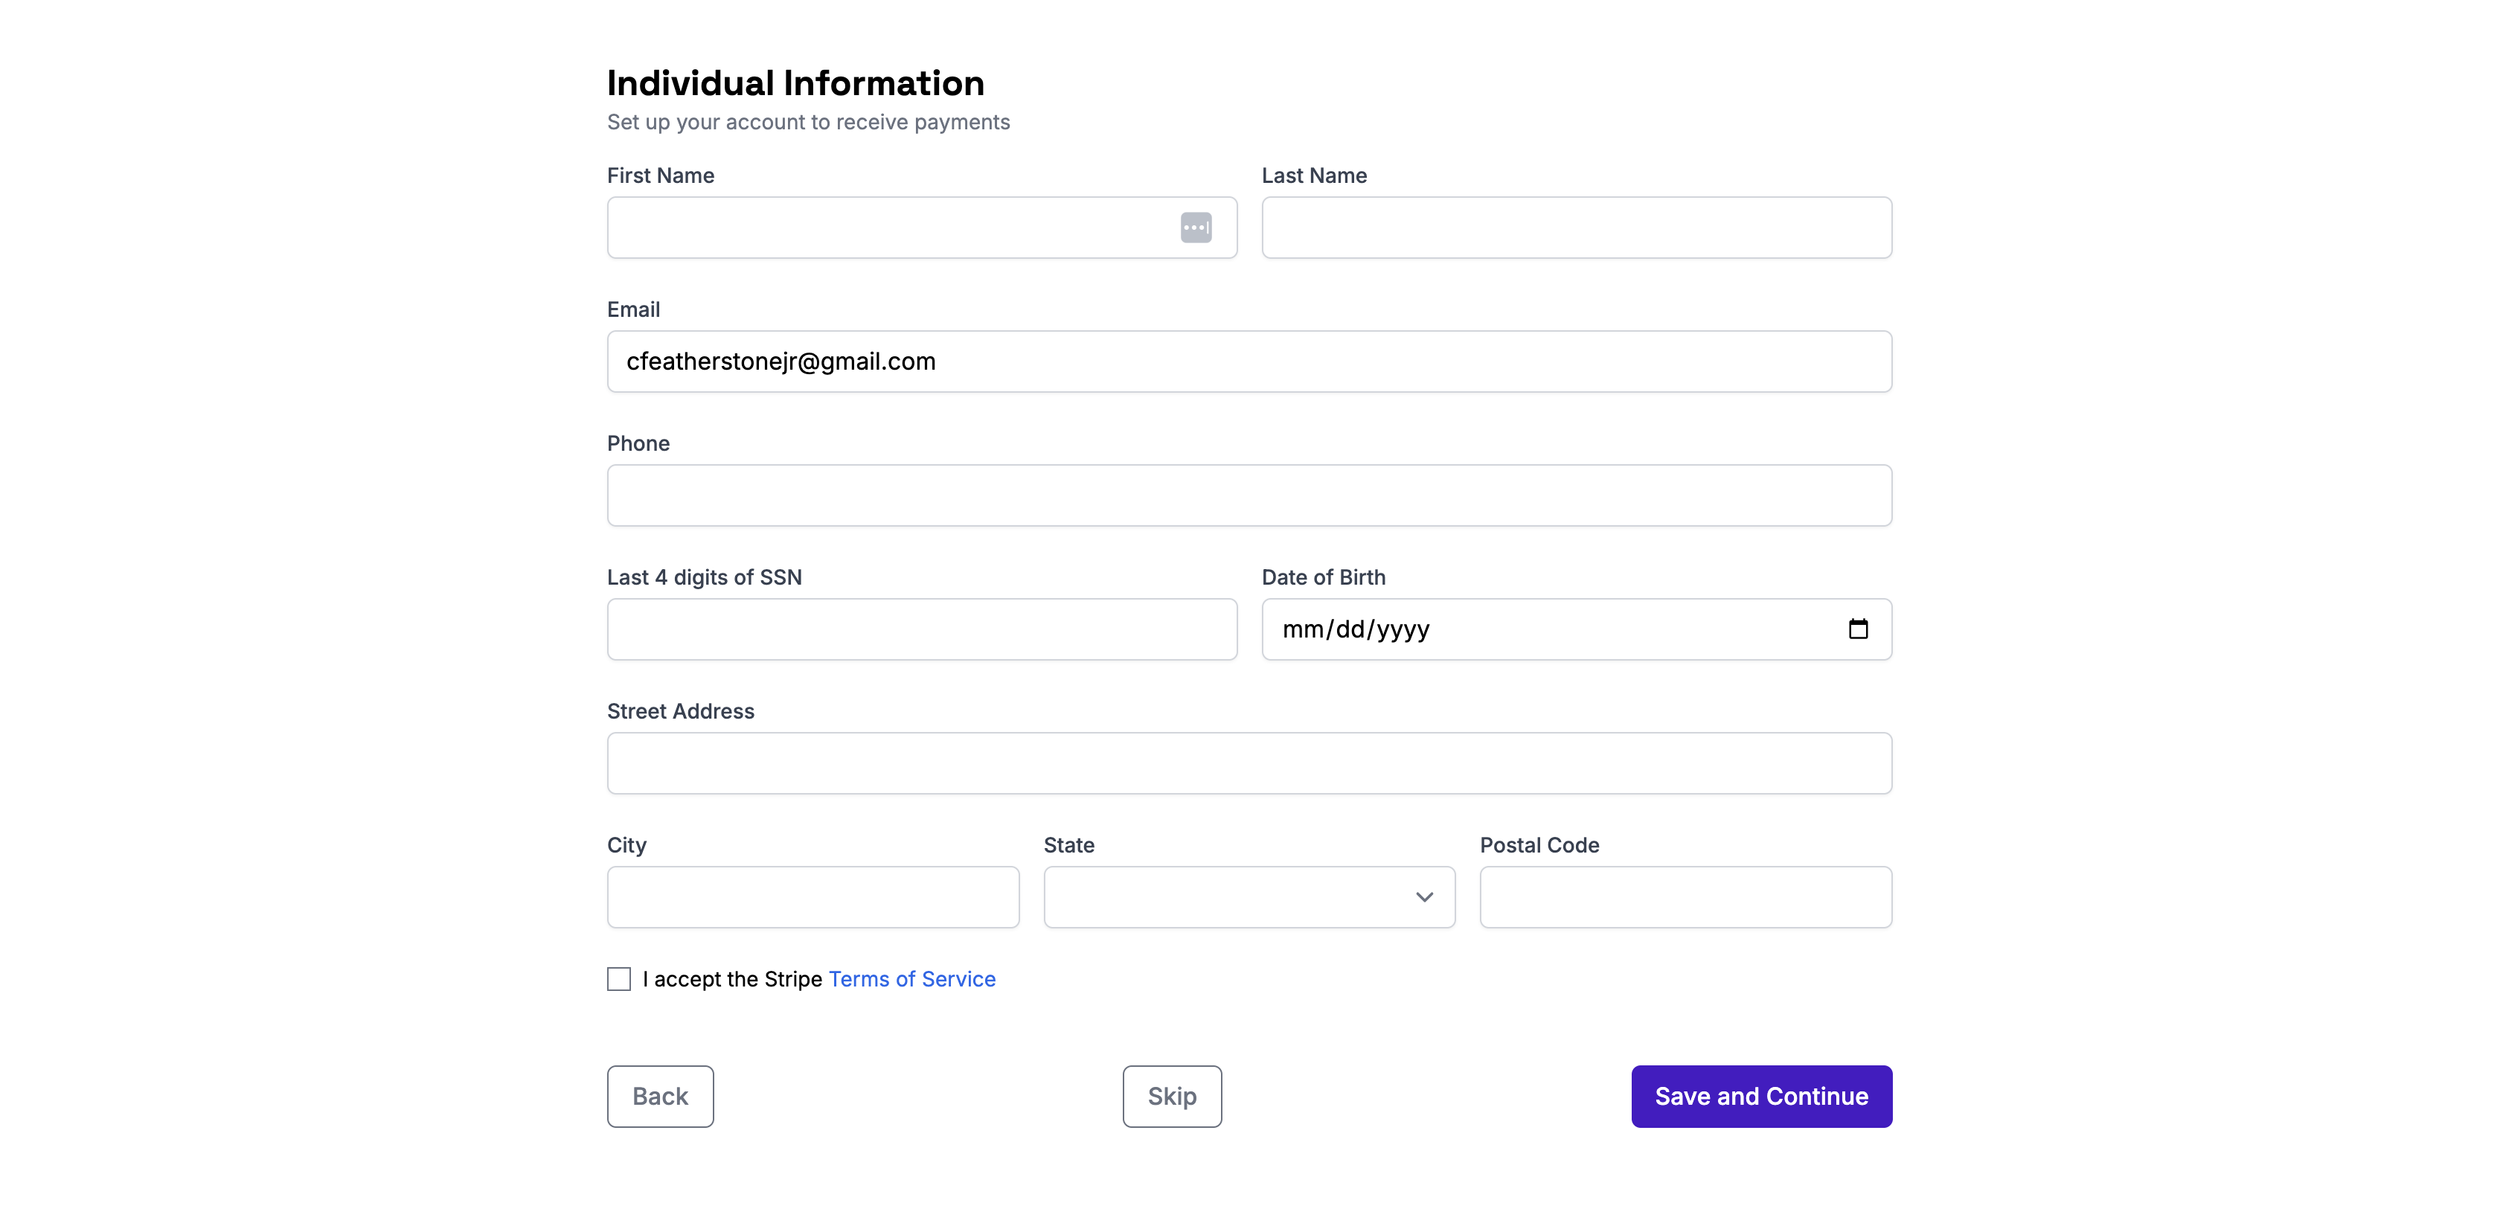
Add Your Individual Information
Next, you'll be asked to enter basic details about yourself or representative information if registering as a corporation or LLC.
Note:
Regardless of your business structure, the information you provide will be used for tax documentation and receipts generated through Lineup. Once your earnings exceed $600, Lineup will issue a 1099-NEC form for payments over this amount. The form will be sent to the email provided in your individual or company representative information as shown below.
Connect A Bank Account
Lastly, you’ll need to connect a bank account to complete the verification process, allowing you to start booking gigs and getting paid.
Note: If you prefer to do this later, you can add payment information anytime by selecting Account from the dropdown menu, then choosing Payment Information to follow the same steps. For a comprehensive breakdown of this process of connecting your bank account you can learn more from our tutorial Adding Payment Information.
Ready for the next step in getting booked? Head on over to the next tutorial: "Your Dashboard."


